Hearty Whole Grain Sun-dried Tomato Crackers

With so many fun ideas recently regarding charcuterie boards, I really needed some wonderful crackers to go with the vegan cheese blocks I found at Costco. Honestly, boxes of crackers that aren’t just white flour and refined oil cost an arm and a leg – and aren’t particularly flavorful. So, I popped online to find vegan whole wheat cracker recipes. There are many gluten-free options, but I didn’t find a lot of whole grain options.

The next step was to dig through my cookbook collection. I ended up in an old cookbook from 1974, that had belonged to my mother. It was plant-based before vegan was a well-known word. Some of those recipes have ingredients that I don’t recognize in today’s market! I knew I had made a cracker recipe from it before, but my hubby hadn’t been a fan. But tucked in between the pages were 2 pieces of scrap paper with scribbles delineating things I had tried years ago in order to make the crackers stand up taller in his eyes. I whipped up a batch and he loved them! And best yet, they pair nicely with the milder kinds of vegan cheese that are out there.

The original recipe called for 1 cup of wheat germ. I try to only eat organic grains to avoid glyphosate (to which I react poorly), however, an organic wheat germ was elusive. Instead, I substituted 3/4 c. coarsely ground flaxseed which I ground myself. If you can only find finely ground flaxseed, I would use 1/2 a cup, because it absorbs so much more liquid from the dough that it becomes difficult to roll out.

Hearty Whole Grain Sun-dried Tomato Crackers

  • 3 c. rolled oats
  • 2 c. whole wheat flour
  • 1/2-3/4 c. coarsely ground flaxseed (or 1 c. wheat germ)
  • 1-1/4 tsp. salt (plus extra for topping)
  • 1/2 tsp. garlic powder
  • 2 tsp. onion powder
  • 2 tsp. dried basil
  • 1 T. sweetener of choice (may be liquid)
  • 2-4 T. sun-dried tomatoes packed in oil
  • 1 c. water
  • 2/3 c. extra virgin olive oil

Adjust your oven racks for using 2 cookie sheets at once, avoiding the very bottom and top slots to prevent burning. Preheat oven to 400ºF. Cut parchment paper to fit inside of a 10″ x 15″ cookie sheet with edges. (If you want thinner crackers, use a larger cookie sheet and larger parchment paper.)

Mix oats, flour, flaxseed (or wheat germ) in a large bowl. Whiz all remaining ingredients in a blender until the sun-dried tomatoes are tiny pieces, or liquified. Stir the wet ingredients thoroughly into the flour mixture with a fork, distributing the moisture evenly. Mix well and knead lightly until the dough doesn’t fall apart. If you need a little more moisture, just dampen your hands a bit at the sink and continue kneading. If the dough is too dry your cracker edges will be quite ragged and it is a challenge to roll out evenly.

Divide dough into 2 equal portions. Place one of your parchment paper pieces onto the counter. Use a rolling pin to roll one of the portions of dough out as evenly as you can to the edges of the paper, being careful to not be too thick in the center or thin on the edges. (Be patient as this can take a while with the oats. If you get rips in the dough, just press it back together. You can even pull off pieces from a thicker edge to press into the torn area and use the rolling pin to even it out again.) Sprinkle with salt and lightly press it into the crackers. Using a dull knife or a bench scraper, score the dough into your desired size of crackers. Once you have accomplished this, you can easily slide the parchment paper with the dough onto the cookie sheet. Set this pan aside and do the same with the other portion of dough.

Place cookie sheets in oven and immediately turn the temperature down to 325ºF. Set a timer for 25 minutes or until lightly browned. Swap placements of the cookie sheets to help evenly bake the tops and bottoms of the crackers. Turn the oven down to 200º and watch them closely until they are thoroughly baked. (If the crackers along the edge are browning before the center ones, you may need to remove those earlier.)

To cool crackers, slide the parchment paper directly onto cooling racks. Once completely cooled, store in an air-tight container.
Updated Dark Chocolate Maple-Almond Granola

After messing with this recipe for several years, I realized I had tweaked it without updating the blog. This is still my favorite granola. So decadent!

This is a whole batch in a gallon jar.

If you need to substitute for the almond butter I can only tell you that the chocolate balance and liquids are off if you just use natural peanut butter instead. I would suggest you check out this link for Chocolate-Peanut Butter Granola.

Dark Chocolate Maple-Almond Granola

  • 8 c. organic rolled oats
  • 3/4 c. organic almond butter
  • 1/2-3/4 c. maple syrup
  • 1/4 c. water
  • 2-3 T. melted organic virgin coconut oil
  • 3/4 tsp sea salt or Himalayan pink salt (more if almond butter is unsalted 1 tsp+)
  • 1 tsp stevia extract powder (with no other additives) – more if you want super sweet granola
  • 1 1/2 tsp vanilla extract
  • 1/2 c. organic, unsweetened cocoa powder (the better the brand, the tastier the end product) – sift this if it is clumped in any way.

Preheat oven to 325 degrees. Cover a large 17” cookie sheet with unbleached parchment paper. (If you don’t have one this large, maybe spread it between 2 smaller ones and bake it for less time – 10 minutes each round in the oven – and see how that works. I used an enormous pan one time, which spread the mix thin, and baked it for the two 15-minute rounds and it burned the edge pieces despite stirring, so it definitely needed less time when spread thin.)

Place the oats in a large mixing bowl. In a small mixing bowl, whisk the almond butter, maple syrup, water, coconut oil, salt, stevia, and vanilla. Stir the cocoa into the almond butter mixture and whisk. (OR you can mix the almond butter mixture into the oats thoroughly and then toss in the cocoa powder and mix like crazy.) With a wooden spoon or silicone spatula, fold the chocolate mixture into the oats, making sure they are thoroughly mixed.

Spread the oat mixture evenly on the cookie sheet, making sure to not leave the ends thinner than the middle, or they will burn. 

Bake for 15 minutes. Remove from oven and stir the granola (I use a metal spatula/pancake turner, flipping it over so that what was against the bottom of the pan isn’t anymore.) Evenly distribute on the pan again, and bake for another 15 minutes.

At this point, if you prefer chewy granola, place the pan on a cooling rack to completely come to room temperature. If you prefer crispier granola, turn the oven off, stir the granola one last time, and return the pan to the oven for 10-15 minutes. (You can test the texture of the granola after the second 15-minute bake by taking a piece and setting it on the counter while you are stirring the rest of it. Taste it and see if you like the texture.)

After completely cooled, place in a glass jar, crock, or other non-plastic container with an air-tight lid to keep moisture out. This will make more than half a gallon.

True Love

Since today is Valentine’s Day, I thought I’d pop in and highlight the truest love I’ve ever found in my life. (I figure if you needed a recipe to make as a gift, you’d already have found it by this late in the day.)

“For God so loved the world, that he gave his only begotten Son, that whosoever believeth in him should not perish, but have everlasting life.”

This love has changed my life forever! And will into eternity. I hope you will allow Him to change your life, too. You’ll never regret it.

Dark Chocolate Maple-Almond Granola

I discovered that if I eat peanut butter too often, puffiness occurs. While I am not allergic to peanuts, apparently, they do bother me some. I decided that my chocolate-pb granola was out, sadly. With a few modifications to that recipe, however, I quickly fell even more in love with this one instead.

When I first created it, I didn’t add the coconut oil, but something was definitely missing. I accidentally left it out in my last batch, and I will try never to do that again. It just isn’t as good. I realize I gave a wide option for how much oil to add, but measuring it accurately before you melt it can be a lazy woman’s challenge. I mean, who wants another measuring cup to wash? I happen to love my glass Pyrex liquid measuring cups and I use them carefully for everything, even dry items, but it does keep you from having that even measure in the smaller plastic ones that you scrape off the excess with a knife edge. So, don’t fret it too much and see how much you get after you melt it in the microwave in a glass measuring cup. Use what you have as long as it is at least 2 tablespoons. I’ve used as much as 1/3 c. before and still had excellent results.

This is wonderful with chopped berries or banana slices, walnut pieces, cacao nibs, or mini chocolate chips.  It also is good on non-dairy yogurt or smoothies, or just by the handful as a snack. 

Dark Chocolate Maple-Almond Granola

  • 6 c. organic rolled oats
  • 3/4 c. organic almond butter
  • 1 c. maple syrup
  • 2-6 T. melted organic virgin coconut oil
  • 3/4 tsp sea salt or Himalayan pink salt
  • 1/2 tsp stevia extract powder (with no other additives)
  • 1 1/2 tsp vanilla extract
  • 1/2 c. organic, unsweetened cocoa powder (the better the brand, the tastier the end product)

Preheat oven to 325 degrees.  Cover a large 17” cookie sheet with unbleached parchment paper.  (If you don’t have one this large, maybe spread it between 2 smaller ones and bake it for less time – 10 minutes each round in the oven – and see how that works.  I used an enormous pan one time, which spread the mix thin, and baked it for the two 15-minute rounds and it burned the edge pieces despite stirring, so it definitely needed less time when spread thin.)

Place the oats in a large mixing bowl.  In a small mixing bowl, whisk the almond butter, maple syrup, coconut oil, salt, stevia, and vanilla.  Sift the cocoa powder through a wire mesh strainer into the almond butter mixture and whisk.  With a wooden spoon or silicone spatula, fold the chocolate mixture into the oats, making sure they are thoroughly mixed.

Spread the oat mixture evenly on the cookie sheet, making sure to not leave the ends thinner than the middle, or they will burn. 

Bake for 15 minutes.  Remove from oven and stir the granola (I use a metal spatula/pancake turner, flipping it over so that what was against the bottom of the pan isn’t anymore.)  Evenly distribute on the pan again, and bake for another 15 minutes.

At this point, if you prefer chewy granola, place the pan on a cooling rack to completely come to room temperature.  If you prefer crispier granola, turn the oven off, stir the granola one last time, and return the pan to the oven for 10-15 minutes.  (You can test the texture of the granola after the second 15-minute bake by taking a piece and setting it on the counter while you are stirring the rest of it.  Taste it and see if you like the texture.)

Place in a glass jar, crock, or other non-plastic container with an air-tight lid to keep moisture out.  This will make around half a gallon or so. 

Old-Fashioned Sugar Cookies

I have another sugar cookie recipe on my blog that uses far less fat in it with a cakey texture if that is what you are looking to make. However, if you want a bakery-style, old-fashioned sugar cookie with full flavor and great texture, you simply must try these. I decided to pull out my mom’s recipe and back-track to keep the old richness with the new veganism.

Since we’re all busy this time of the year, I’m going to keep this short and just get you the recipe. Have a wonderful, merry Christmas, Hanukkah, and anything else you celebrate. If you want a frosting recipe, click here.

My new experiment with a cookie stamp.

Sugar Cookies

  • 1 c. Earth Balance buttery sticks, softened
  • 1/2 c. coconut oil, softened
  • 2 T. soy sour cream (or more coconut oil)
  • 2 c. evaporated cane juice crystals (or sugar) plus more for top of cookies
  • 1 1/2 tsp. vanilla extract
  • 1/2 tsp. almond extract
  • 4 1/2 tsp. Ener-G egg replacer powder
  • 1/2 c. non-dairy milk
  • 4 1/2 tsp. baking powder
  • 3/4 tsp. salt
  • 6 c. King Arthur’s white whole wheat flour, or w.w. pastry flour

Preheat oven to 375 degrees.  Line the cookie sheets with parchment paper.  Thoroughly cream margarine, evaporated cane juice, and vanilla.  Add egg replacer powder, stirring thoroughly.  Gradually beat in the milk by hand, or use a mixer and do it all at once.  Continue beating until fluffy and no separation remains.  Stir in salt and baking powder well, then flour immediately afterwards.  Stir until no dry spots remain.  If necessary, add another T. or so of milk.

Roll dough into balls, place on cookie sheets, and flatten with a glass dipped into more of the evaporated cane juice crystals, or a cookie stamp.  (After you have rolled the cookie dough into balls, you may need to rub your hand on the bottom of the glass the first time so that the sugar will stick to it.)  Bake for 6-8 minutes.  Cool slightly and remove to cooling rack.

If you wish to roll cookies out for cut-outs, chill the dough for an hour or more.  Use a metal spatula or dough scraper to gently lift the cookies from the countertop so they keep their shapes.  If you do this, you will not need to flour the countertop at all, which makes a tastier cookie.

Thick and Creamy Vegan Potato Soup

It has been a while since I created a new recipe!  Today, it has finally been cool enough to recognize that it is kind of fall here in Ohio.  It isn’t supposed to last long with the high 80’s and even some 90-degree days coming back, but it gave me an excuse to make a small pot of soup. 

Creating this soup took about 45 minutes from start to finish – and that includes chopping the veggies, fiddling with seasoning measurements until I was happy with the results, and running next door to the garden our neighbors have graciously shared with us so that I could snip a stalk of rosemary.  I diced everything very small so that it would cook up quickly.  It shouldn’t take as long to make on a regular basis following the recipe.

This soup has a mild flavor, which is what my hubby prefers, but if you want it even milder, leave out the rosemary and fennel.  (Then it will be a smaller, thicker version of my gigantic recipe of potato soup.)  I like the interesting notes they bring, though. A quick drizzle of good olive oil in each bowl adds a nice touch, but isn’t necessary.

Thick and Creamy Potato Soup

  • 4 c. small-diced red potatoes (I used about 3 sm/med.)
  • 1 onion, diced (I used half of a red one and half of a yellow one, because I had them leftover)
  • 1 sm. carrot, shredded
  • 1/2 c. frozen, chopped spinach
  • 3/4 tsp salt
  • 3 c. water
  • ¼ c. cashews
  • 3 T. barley flour
  • 1 tsp onion granules/powder
  • 12 fennel seeds (If you like fennel seeds, throw in a few more! My hubby isn’t fond of them)
  • 2 tsp chicken-style seasoning
  • ¼ tsp dillweed
  • 1 T. fresh rosemary
  • 1 c. unsweetened non-dairy milk (I used soy)

Bring the first 6 ingredients to a boil in a 3-4 qt. pot, and boil for 5-7 minutes while you ready the remaining ingredients.

Whiz the last 8 ingredients in a high-powered blender until smooth.  When the veggies are just tender, stir the blender contents into them, stirring constantly.  Turn the heat down and simmer for 5 minutes. 

Serve with a drizzle of flavorful extra-virgin olive oil and some crusty whole grain bread.

Makes 3-4 bowls of soup.

Chocolate-Peanut-Butter Granola

A while ago, Costco carried a delicious, dessert-like chocolate-peanut-butter granola with little pieces of dark chocolate in it. My hubby was a big fan, and I was buying it often. Then they stopped carrying it to bring out the summery chocolate-berry version. Hubby was not happy. He prefers the other kind. The grocery store carries it, but if you think it was a high-end bag of cereal at a warehouse, let me tell you, the price was worse at the grocery store! I told him that I would see if I couldn’t make a version at home instead.

My sister-in-law, Melanie, gave me a recipe a couple of years ago for addictive peanut butter granola. (I don’t know the source of it, so I cannot give credit for it, unfortunately.) Hubby didn’t care all that much for it. I figured it wouldn’t take too much to turn that recipe into a chocolate variation that he would like. Some tweaking and we have a winner! It isn’t as sweet as the packaged version, but I prefer that. If you want, you can add mini chocolate chips, or break up some chocolate bark into your bowl to make it as dessert-y as the bagged version. Or cut up some fresh strawberries into it for decadence that is healthier….or do both! HA! Yum!

As you can see from the picture, it makes nearly a gallon. Believe me, it won’t last long once somebody discovers it can replace dessert!

Chocolate-Peanut-Butter Granola
(Please note that I use as many organic ingredients as possible)

  • 6 c. rolled oats
  • 3/4 c. natural peanut butter
  • 1 c. maple syrup
  • 1/4 tsp. pure stevia powder
  • 1 1/2 tsp. pure vanilla extract
  • 3/4 tsp. sea salt or pink Himalayan salt
  • 1/4 c. cocoa powder, sifted
  • mini chocolate chips or broken squares of chocolate bark, optional
  • fresh berries, optional

Preheat oven to 325 degrees. Cover a large cookie sheet with unbleached parchment paper.

Measure the oats into a large mixing bowl. Put the peanut butter, maple syrup, stevia, vanilla, and salt in a 1 quart mixing bowl, whisking until well blended. Carefully stir the sifted cocoa powder to the peanut butter mixture until evenly distributed. (If you add the cocoa before this step, it becomes a thick mess that requires water to be added just to get things to smooth out. Then it takes longer to bake and is a bit rubbery.) Mix the chocolate mixture into the oats, stirring thoroughly, making sure that all of the oats are coated. I found that a long-tined fork works really well for this.

Spread the coated oats evenly onto the parchment-covered cookie sheet. Bake for 15 minutes. Remove from oven and stir carefully, trying to get the granola from the ends of the cookie sheet into the middle and vice versa. Place back into the oven for 10-15 more minutes, paying close attention to make sure it doesn’t burn on the bottom. (If you place a small piece of the granola from the middle of the cookie sheet on a plate or the countertop and it hardens, then the rest of the granola is done.) Cool cookie sheet on a baking rack until granola is cooled thoroughly. Store in an airtight glass container.

Serve with mini chocolate chips, or chocolate bark, and/or fresh berries and non-dairy milk.

Tex-Mex outside of Georgetown, TX

We so rarely get away from our little neck of the woods and from home cooking.  However, when the time arises, it can either be fun, or frustrating to find good vegan food in an area, or restaurant that you’ve never tried before. The trick is to relax and not fret about it.  Most times, servers are more than happy to help you figure out something to eat as a vegan.

We went to Georgetown, TX, to help our oldest son and daughter-in-law find a house to buy when they relocate there soon.  When lunch time came, the realtor suggested we break for food.  He took us to Serrano’s for Tex-Mex outside of Leander, TX, in an area that Google Maps declares is Cedar Park.  My daughter-in-law was so happy, because she LOVES Mexican food and both of them love very spicy stuff.  I figured I could subsist on chips and salsa, if necessary (and I could do it happily), but hubby isn’t a fan of spicy and was healing from getting wisdom teeth pulled a week earlier to boot.  What would we find to eat?  Of course, hubby isn’t allergic to dairy like I am, so he could manage if need be.  But I mean, when I was growing up Mexican food was nothing without cheese and sour cream.

I shouldn’t have given it a thought.  We ordered a dinner-sized portion of veggie fajitas to split between the 2 of us.  Not only was it spectacularly delicious, but we walked out stuffed!  There is NO way I could ever eat that whole thing all by myself.  Their fajitas come with a side of separate guacamole, fresh tomato salad, and shredded lettuce (and a pile of cheese, but, like I said, we just left that alone.)  There was a big plate of refried beans and rice, a container of tortillas, and a large wooden platter holding a steaming cast iron flat plate of roasted/fried onions, mushrooms, and peppers of all sorts (look out – one of them is HOT and will take you out!  Just leave it on the platter for those who can’t do 12 alarm peppers.  The realtor ate his and had tears in his eyes.)  Don’t forget the chips and salsa, and we ordered a side of guacamole before we knew more was coming with the fajitas.

I didn’t even think to take pictures.  How I wish I had so that you could see the pretty table full of food.  There was a boat-tailed grackle or two wandering through the open veranda where we were eating as he searched for dropped goodies to scarf down.  He would have made a good picture, but by the time I saw him, my hands were too messy to reach for my phone.  (If you have never eaten fajitas, just plan on making a mess.  It’s part of the fun.)

I look forward to going back some day when we go to visit our kids down there.  (And, yes, they found a house only 12 minutes or so away from this wonderful restaurant!)

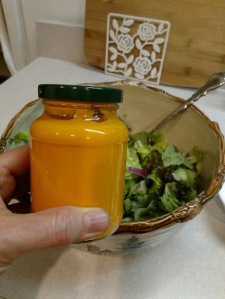
Vegan Carrot-Ginger Salad Dressing

We have a new restaurant near us called Corelife Eatery.  It is not only gluten-free, but they serve real, live food!  What I mean by that is that there are so many vegetables available, bright and colorful, right in front of you as they put your order together.  It works similarly to Subway in that you can choose what you want to go in your salad, grain bowl, or broth bowl.  (Seriously, click on their link and check out their menu if you want new ideas to create your own new dishes!  They are amazing.)  While they mostly have meat options, they do have a vegan option in each category, as well as build-your-own options.  I tried a grain bowl the first time just as it was designed – no changes by me in line – with kale as the base, broccoli pieces, shredded beets and carrots, roasted tofu, quinoa, and more.  They topped it with a carrot-chili vinaigrette and shredded ginger on top of it all.  It was SO good!!  Like all restaurants, they aren’t necessarily cheap enough to eat supper there every day of the week, even for an eatery-style dining area.  So, what’s a girl supposed to do?  Create her own dressing, of course!  I mean, the salad part is easy enough.

Corelife made it simpler for me.  It has newspaper menus to take home that tell all about their delicious dishes and list what is in each of them.  (They are meticulous protecting you if you say you have an allergy, which is wonderful.)  The newspaper-menu also lists what is in their dressings.  Their carrot one starts with carrot juice.  Well, now, honestly, when I’m in the midst of the throes of making dinner, I’m not about to get out the juicer to squeeze a couple of carrots just for my dressing, only to have to clean up afterwards!  A food processor for shredding the beets is enough moving parts to wash.  I figured I could use a thicker dressing anyway.  Sooooooo, I threw a whole carrot into the blender with other stuff and gave it a whiz.  It was pretty good, but I forgot to write down exactly what I did…rats.

The next time, I made sure to write it down.  While this dressing works very well on any salad I have put it on, it tastes the best on red curly kale and alfalfa sprouts with shredded beets and avocado.  Anything else you add is…I hesitate to say this…icing on the cake.  (What a strange word picture to use about a salad….sorry.)  Cucumbers, red onion slices, tomatoes, sunflower seeds, olives all work very well.  For those of you who have never had raw shredded beets on a salad, you will be so surprised at how delicious it is!

This dressing is quite thick.  It sticks to the greens nicely.  If you want a thinner version, add more water and/or oil, or use smaller carrots.  Remember, dressings are really, really forgiving and you can add or subtract from the measurements as your tastes decree.  Don’t have flaxseed oil?  Substitute olive, or another healthy oil.  Love garlic?  Throw in another clove or two.  Prefer spicier dressings?  Add more sriracha.  Hate ginger?  Leave it out – it is still amazing.  Or put more in – but look out!  It will knock you off your chair!  If you want to get an extra, hidden veggie into your kids, try making a batch with half the garlic and no ginger so that they are happier with the flavor.  Let them dip whatever raw veggies they DO like into it.

I did not put salt in this recipe, because even a little bit seemed so salty to my taste.  I had crossed it out on my scribbled list, but thought that must be a mistake the second time I made it and added a few sprinkles.  Nope!  I figured everyone could add it directly to their salad if they wish for it.  You can always add a little to your blender if you wish.  I recommend starting with 1//8-1/4 tsp and tasting to see if you want more.

Carrot-Ginger Dressing

  • 2 large carrots, scrubbed or peeled, and cut into 2″ pieces
  • 2 cloves of garlic
  • 1 penny-sized slice of ginger (I used 2-3 last night and it was SO strong, but delicious)
  • 1 T. flaxseed oil
  • 1 tsp. olive oil
  • 1 tsp sriracha sauce
  • 1-2 tsp liquid sweetener (I used raw honey, but Corelife uses agave)
  • juice of 1 lemon (you could use your favorite vinegar instead, but I’m not a fan of vinegar)
  • 6 T. water (if you use smaller carrots, use less water)

Throw it all into a high-powered blender and whiz for a minute or so.  You don’t want to go for too long, or it heats it up and destroys some of the nutrients, especially in the flaxseed oil.

Store in a small jar.  Mine fit in a re-purposed Trader Joe’s relish jar, which I would guess is about a cup.  (Don’t you love my exact measurements?  Sorry!)  It keeps in the frig at least a week, but mine never lasts longer than that before it is eaten up.  I recommend spooning it out of the jar, rather than pouring, because it is so thick, you can get more than you bargained for on your salad!

Savory Baked Beans (with sweet option in notes)

I adore baked beans – sweet ones – so I had to figure out a way to make them taste good without the added inflammatory and caloric additions of sweetener.  These came out spectacularly savory and delicious.  Organic products aid in gaining the extraSavory Baked Beans flavor that the sweet usually masks.  If you still want a touch of sweetness, check out the note at the bottom.

I used a 2-qt casserole and ended up with splatter in the oven.  You might want to use a large dish to avoid that.

Without further ado – here’s the recipe!

SAVORY BAKED BEANS

  • 4 cans mostly drained organic pinto beans
  • 1 15-oz can organic tomato sauce
  • 1/2 tsp hickory smoke seasoning
  • 3/8 tsp organic dry mustard
  • 1 tsp salt
  • 2 tsp organic garlic powder
  • 2 tsp organic onion powder
  • 2 T. nutritional yeast flakes
  • 2 c. chopped organic onion
  • 3 lg organic garlic cloves, minced
  • 1/4 c water, as needed (see picture at bottom for how soupy it should look before baking)

Mix all in a large covered (this can be foil) casserole dish, adding water if things look fairly dry.  Bake at 375 degrees for 75-90 minutes, or until onions are soft enough for your tastes. To speed the baking process up some, you could saute the onions in the 1/4 c of water first.  

Note: if you want sweet baked beans, add 1-4 T. maple syrup, or, perhaps, 1 T. molasses and 1-3 T. maple syrup.  You can also use some applesauce along with the maple syrup to sweeten it more healthfully.  You can’t even tell after it is baked!  It got the thumbs-up from my fussiest eater.Savory Baked Beans uncooked